Wednesday, May 28, 2014

Silk undies as a form of procrastination

It's true: receiving a bunch of underwear fabric in the mail makes it really difficult to focus on the things I'm supposed to be doing.  Just seeing all that beautiful silk and stretch lace....knowing that a pair of underwear will take 30-45 minutes...well, clearly I had to make two pairs.

Stretch silk in salmon (Mood)
Stretch lace (Mood)

Stretch silk in peach (Mood)
Stretch lace (Mood)
For the pattern, I used the Betty High Waist Panties by Ohhh Lulu, but trimmed down about 3 inches for a "boy short" size.
Next time, I'll have to wait to order new fabric until I'm done with all my "chores".  

Monday, May 26, 2014

Sewing Indie Month: My SBCC/Britex outfit

Despite popular belief, it really isn't that bad being short.  At 5'1", I've got step stools all around the house and I can manage just fine, thank you very much.  My biggest beef with being petite is that non-petite clothing just doesn't fit.  It's one of the main reasons I sew my own clothing: with some small adjustments, I can shorten bodices, rises, sleeves, and pants to suit my size.  You can imagine my excitement, then, a few months ago, when I did a search for "petite Indie sewing patterns" and stumbled upon Skinny Bitch Curvy Chick!  So when given the chance to participate in Sewing Indie Month with Britex, I immediately knew I wanted to make a whole outfit from SBCC.  What fun!
For my petite-centric outfit, I chose the SB310 blouse in silk chiffon from Britex (sadly, no longer available) and the Manhattan Trousers in lightweight stretch wool.
This is my second version of the trousers (first pair 
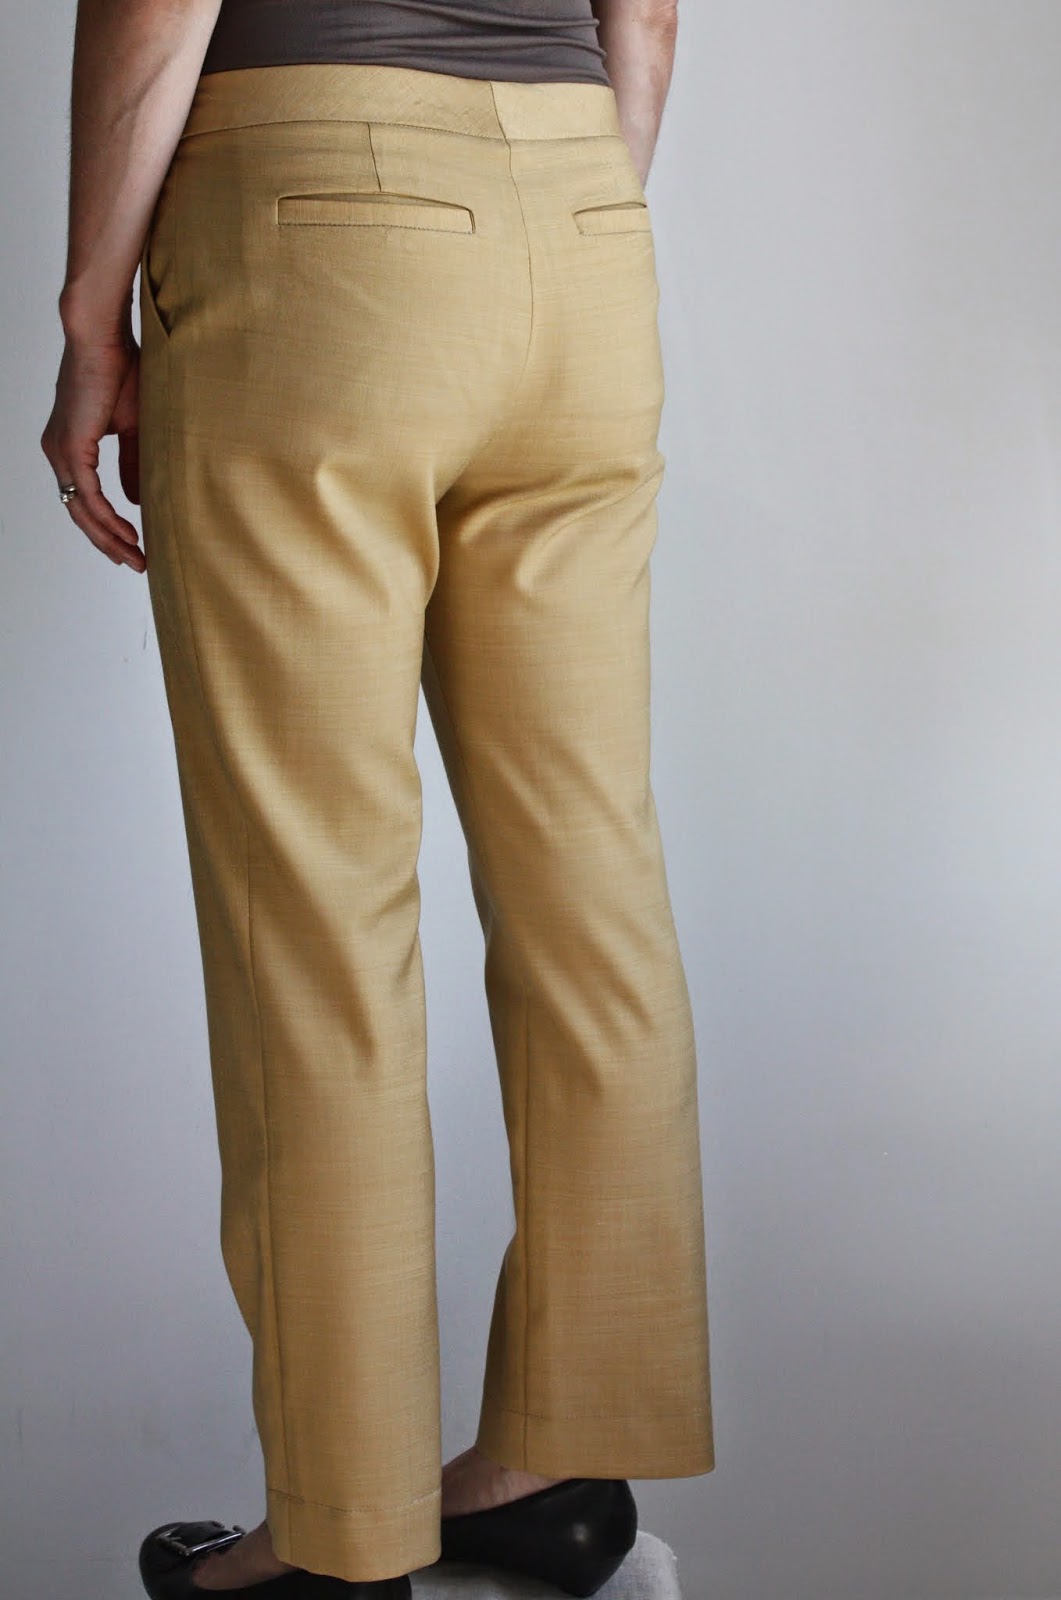
here) and again, I lengthened the rise slightly (after two babies, I prefer a slightly higher rise!).  The fit is spot on and they feel just right--amazing!
The fabric is very lightweight, but I chose not to line the pants so I could wear them in more seasons. I did have to shorten the front pocket bags, since the outline was visible on my thighs (not very attractive!)
The pants are a modern, sleek shape with great design details.  I chose to make the length slightly cropped to balance the blouse, but these trousers could be easily widened or lengthened.  The two piece waistband is contoured as if it were drafted to my body--it's incredible.  Truly, these are my new go-to pattern for all my trouser needs!
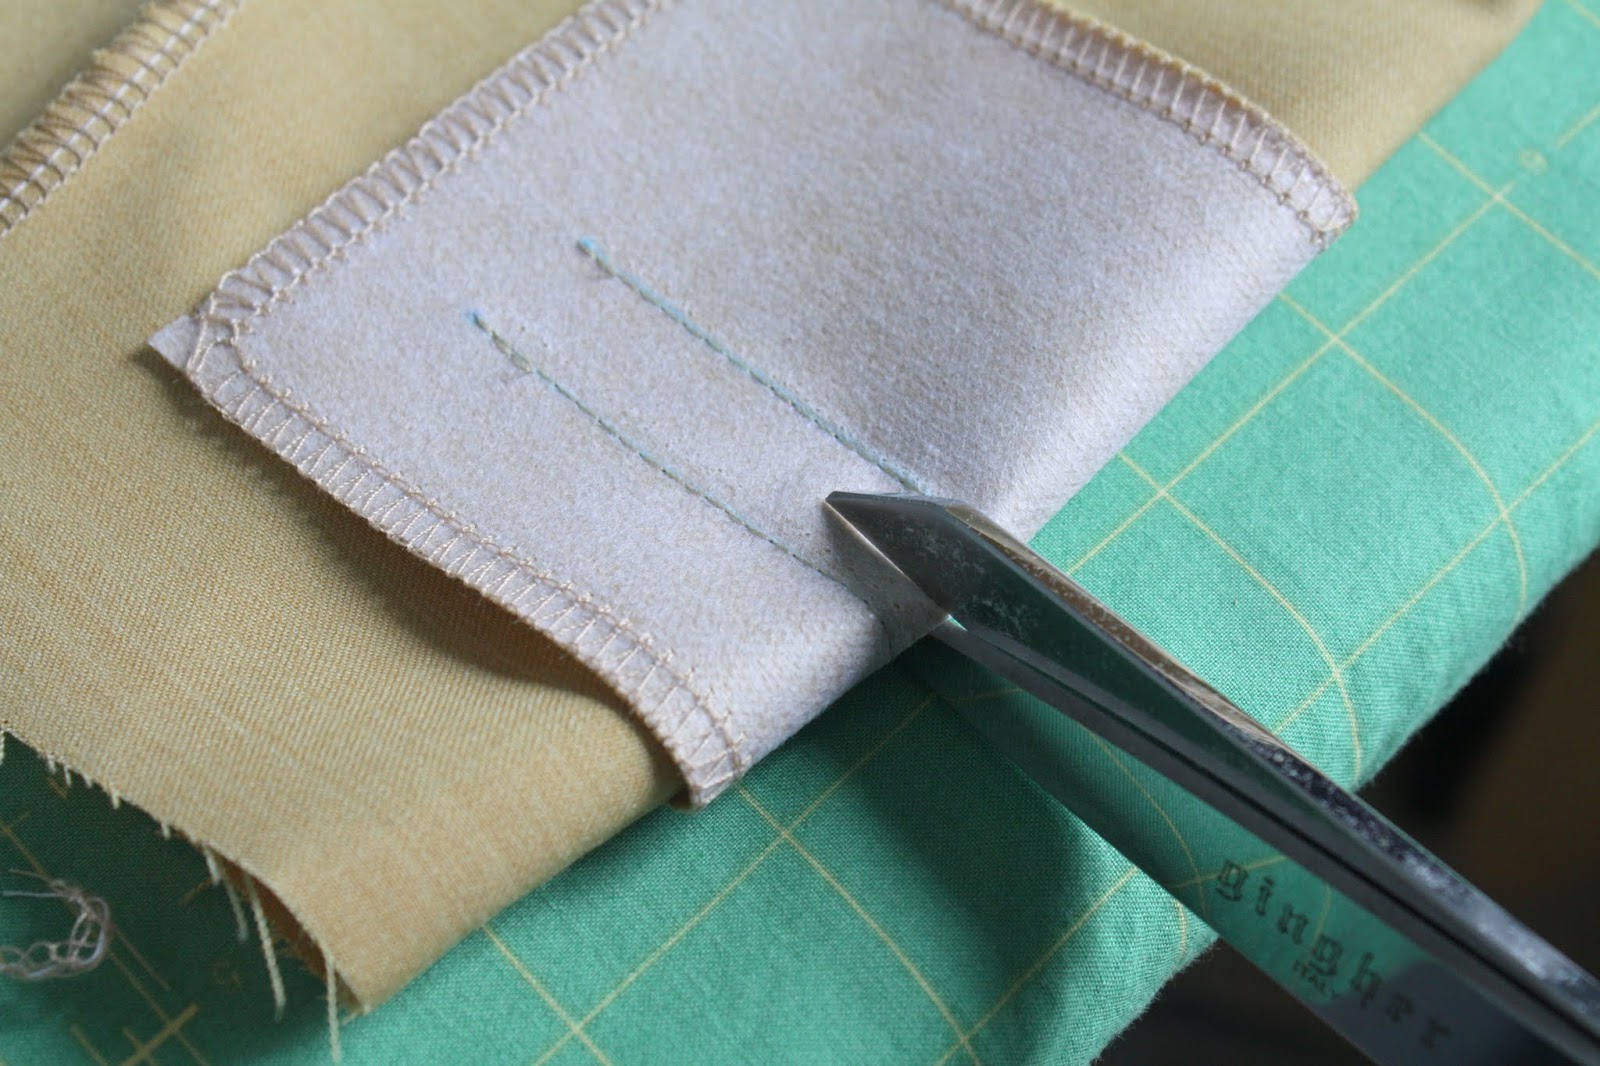
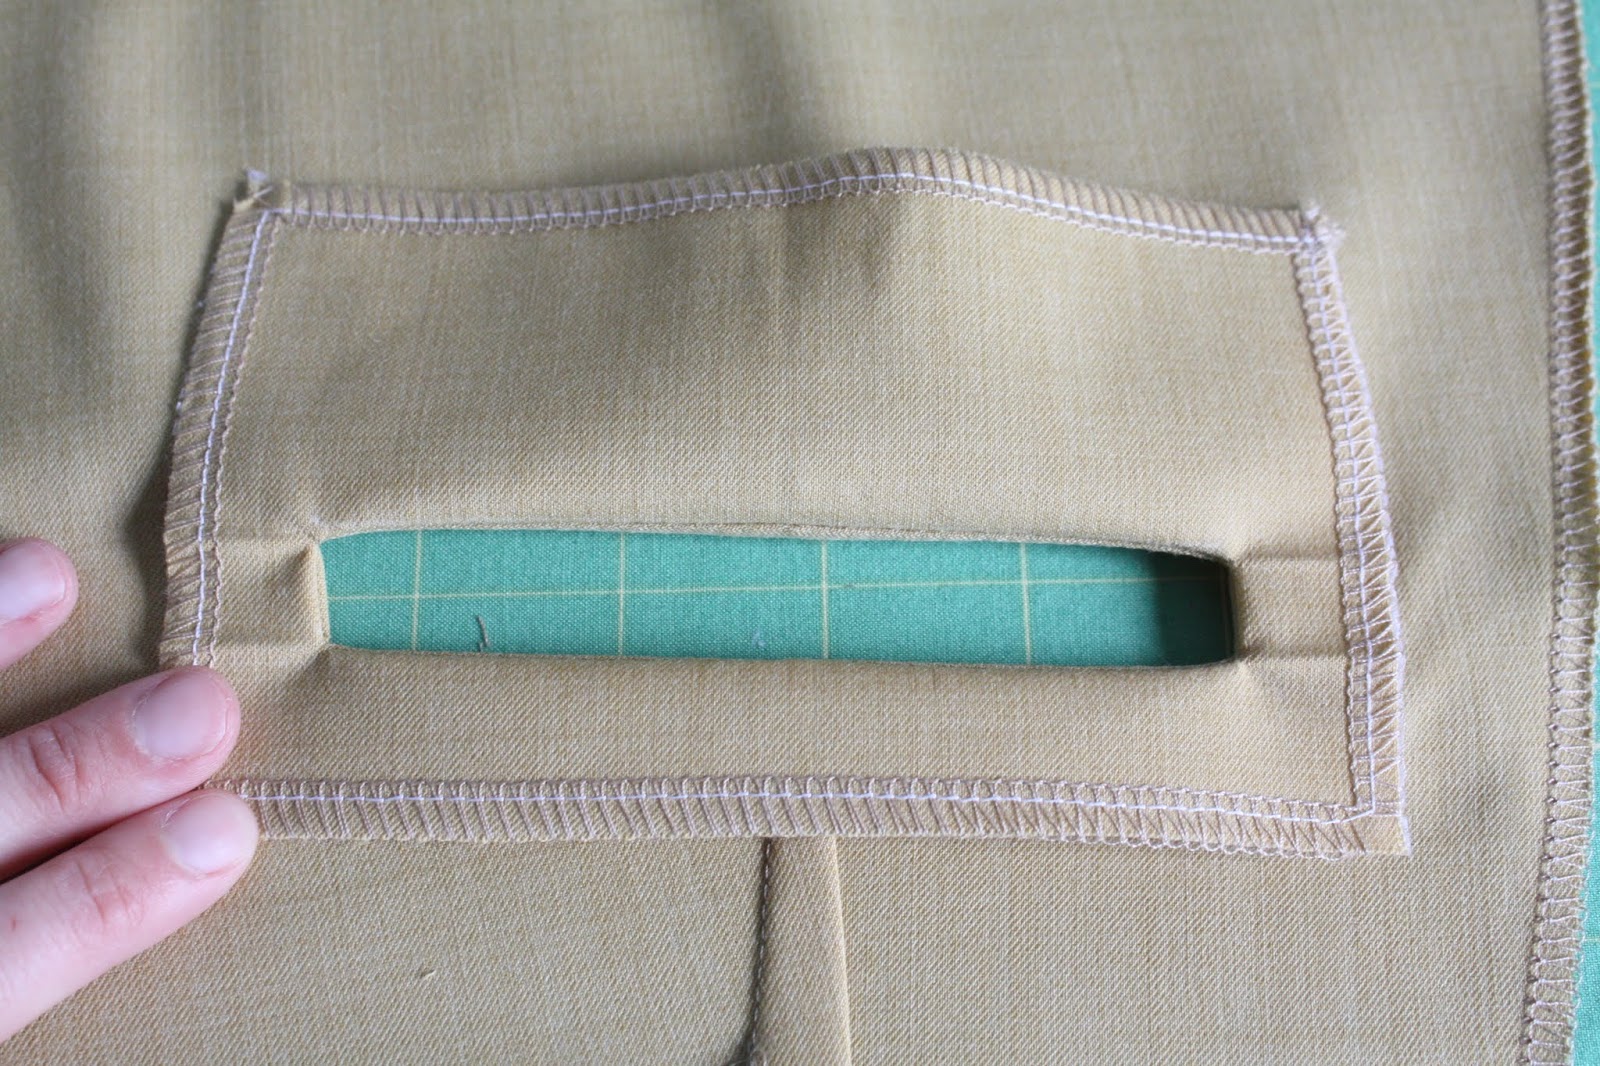
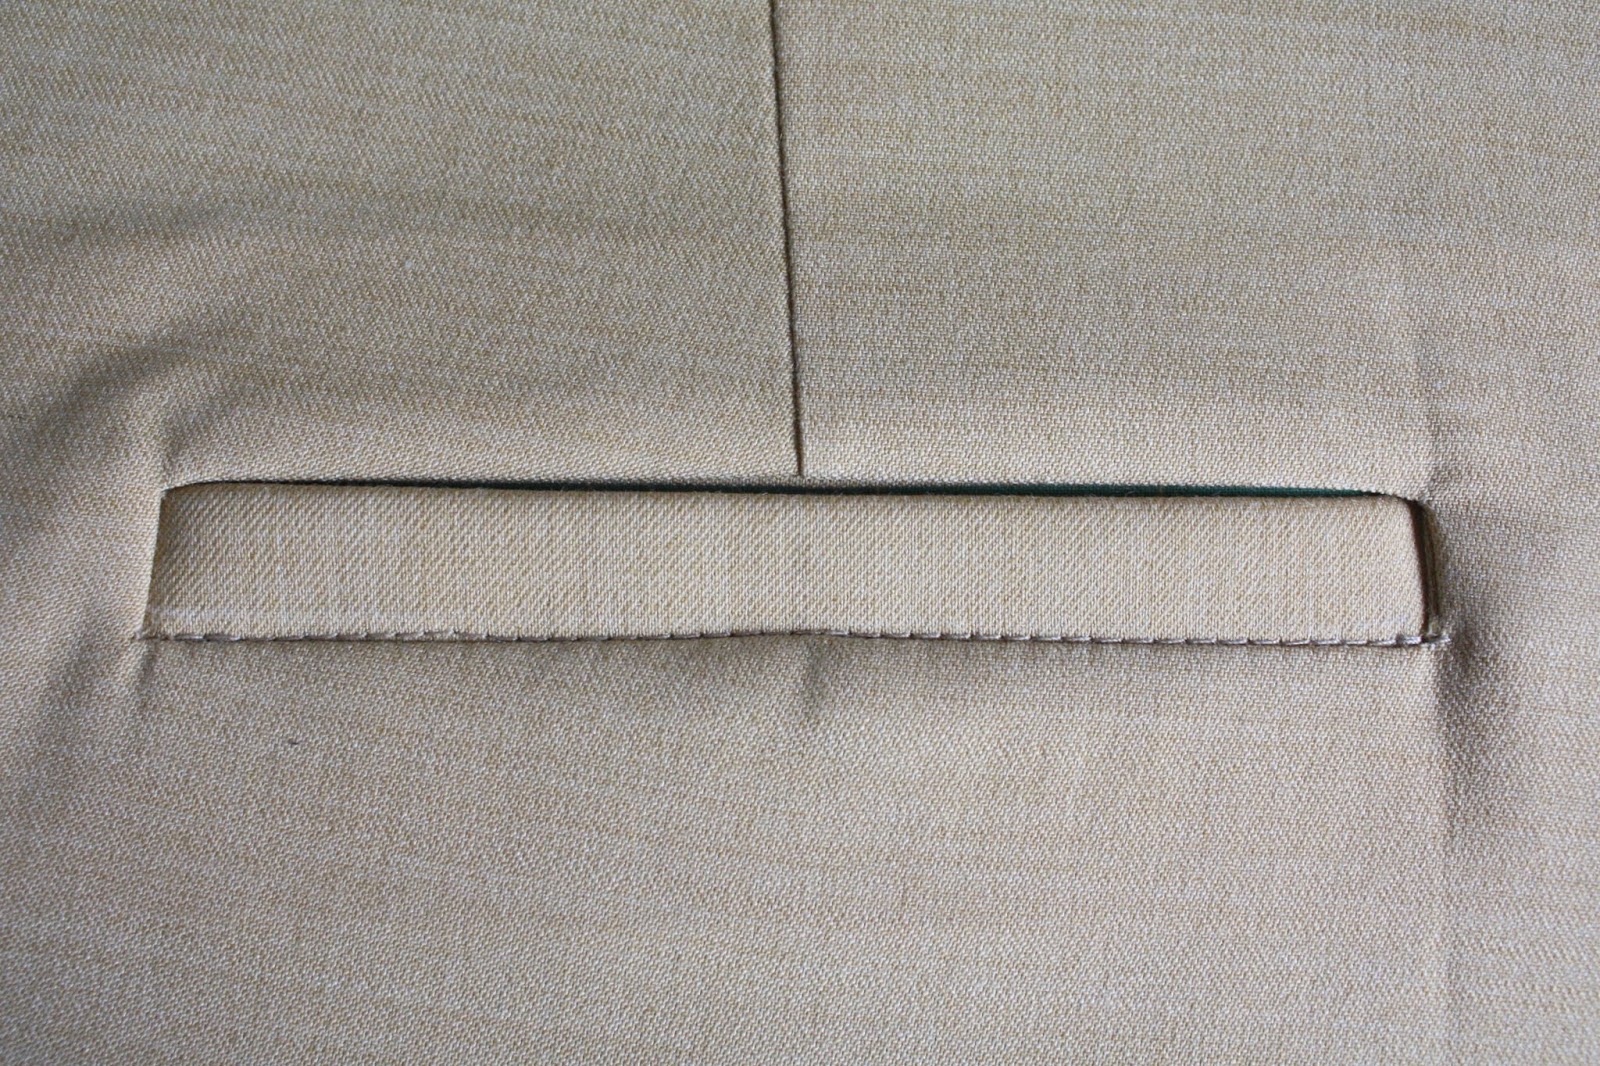
One thing missing from this otherwise incredible pattern were back pockets.  Over the years, I've added welt pockets to any pants, shorts (and sometimes skirts!) that lack them, so I went ahead and sewed a pair of welt pockets to my Manhattan trousers.  And since I love welt pockets so much, I went ahead and wrote up a tutorial (with free downloadable pdf pattern!) so you can make your own!  Wahoo!
I am so proud of my zip fly!  If only it were socially acceptable to show people the inside of my pants. And that perfectly matched metal zipper?  From my stash.   
For the top, I went out of my comfort zone on all counts.  The pattern is not my usual fitted blouse, with its trapeze shape and drapey overlays.  And I have never in my life sewn silk chiffon.  But while choosing patterns and fabric, both just kept calling to me, so I decided to go with the challenge.  The blouse is definitely not perfect, but because it's all flowy and loose, no one would be the wiser!  
When the chiffon arrived, it was about as sheer as possible, so I quickly purchased this ah-mazing white silk for a lining to make it decent.  

All seams are of the French variety, so there is an awful lot of sewing in this relatively simple top!  But aren't they lovely??
It's pretty decadent to use silk bias tape to finish your neckline and armholes!  For this top, I chose to secure the tape to only the lining on the inside, so the seaming isn't visible from the outside.  
For all hems, including the overlays, I used a narrow rolled hem foot.  It's still a bit tricksy and definitely not perfect, but other than hand-rolling the hem (no thanks!), it was the only way to go.  With a little more practice, it may yet become my favorite machine attachment.
You see how sheer that is?  It was like sewing cobwebs.  

All in all, I love my new SBCC outfit!  A huge thank you to Betsy at Skinny Bitch Crazy Chick for the patterns (and all the helpful exchanges over email!) and Britex for providing the fabric.  I love Indie patterns and am so happy to have been able to participate in the Sewing Indie Month!
Resewlution 2014, May garments #3 and 4.

Me-Made-May Round-up #3

Oops, my weekly roundup is a few days late!  I'm sure you were all anxiously waiting :)  I've managed to maintain my streak of at least one handmade garment each day with only one (the first!) repeat garment. Not bad!  And now for the week's outfits:
May 18, Sunday: 30-mile bike ride event in Watsonville, CA.  I spent most of the day in bib knickers and a cycling jersey, so this is my post-ride outfit (pajamas!)
Cardigan: Julia cardigan (handmade, unblogged)
Cami: Ann Taylor Loft
PJ bottoms: handmade, unblogged
May 19, Monday: Substituted in a Bio lab for a colleague at the college.
Blouse: Alma blouse (handmade, here)
Skirt: self-drafted and handmade, here
May 20, Tuesday: Substituted for the lab again and final exam for Patternmaking class
Dress: Cambie dress (handmade, here)
May 21, Wednesday:  Proctored an exam at the college.  This is one of my favorite outfits!
Knit shirt: Target
Skirt: Vintage 70s pattern, handmade here
May 22, Thursday: Sewing, errands and lunch date with my big boy.
Top: "Heidi top", handmade here
Skirt: Ann Taylor Loft
May 22: Friday: Sewing
Blouse: From Japanese pattern book, handmade here
Shorts: Scalloped shorts, handmade here (first repeated garment)
May 23: Saturday: Shopping and errands
Dress: handmade, here
Necklace: made by a local ceramics artist here

I'm realizing that I need more "regular" clothes--basic pants, unfancy skirts and dresses, and simple blouses (not t's).  Luckily, Katie over at the Creative Counselor is hosting a Back-2-Basics Sewalong the first week of June.  I might have to shift my "basics week" until the following since I have several sewing projects (that are not basics!) due around then, but it's certainly on my radar!

Thursday, May 22, 2014

Put a welt pocket on it! (Tutorial and free pattern)

I just don't like the look of pants without pockets on the back.  Even one pocket is good enough for me, just something to break up the wide expanse of fabric covering my bottom.  But even when pants or shorts patterns don't have this feature provided, you can still add one!  There are tons of different pocket styles to chose from, but I like welt pockets since they look professional and match the styling of a wide range of pants/ shorts designs.
Peek at my newest pair of pants
In this tutorial, I will be walking through sewing a welt pocket using a basic pants pattern--one with a single dart at the back waistband, but you can use almost any pants, shorts or skirt pattern.  The welt pockets I'm sewing here are part of my "Manhattan Trousers" by Skinny Bitch Curvy Chick (full post to follow). The welt is sewn in before any side or inseams are sewn, so you'll have to plan ahead a bit.  I like my welt pockets to be about 2" below the waistband seam (measured from sewn waistband to top edge of welt), positioned over the very tip of the back dart.  I actually use the vanishing point of the dart to position the lower stitching line of the welt pocket opening, so it's important that the dart be the right length (3", measured from the raw edge).  The Manhattan trouser dart is slightly longer, so I reduced the length and width slightly and distributed the rest of the dart intake to the center back and side seam.
Original back dart and seams
Redrawn dart and side seams
If you want your welt pocket lower (more than 2" below sewn waistband), the dart length and Pocket Back pattern piece should be increased by the same amount.  For example, if you want your welt edge to be 3" below the waistband, make your dart 4" long and your Pocket Back piece should have 1" added to the upper edge.

Okay, now for the welt.  The fairly standard welt pocket size is about 1/2" x 4.5".  If you are very small or very large, you may want to decrease or increase the width to keep the proportions, but for the majority of folks, this size should be fine.

Download the welt pocket pattern.  (For printing, be sure to unselect "Fit to Page".)

Cut out, interface, and finish the edges of the Welt Facing piece.  Then, using pins and the pattern as a template, mark ends of the dotted lines (the location of the four corners of the welt pocket "window"). Then, draw two parallel lines connecting the dots, making sure the lengths are exactly 4.5".  (Note: the solid line rectangle below indicates the part of the facing that is going to show through the welt "window", the welt itself, for purposes of pattern matching.)
Mark ends of dotted lines with pins
Use pins to mark the wrong side of the welt facing
Two parallel lines (4.5") connecting top and bottom corners
Fold the facing in half to create a reference line and place a pin at the intersection point of the midline and the lower of the two parallel lines.    On the right side of your pants back, position the welt facing at the very tip of the dart (using your pin), keeping the midline point in line with the dart.  You may want to interface the pants (on the wrong side) where your welt will go (I did not to reduce bulk).
Right sides facing, align the middle of the welt facing with the back dart
Pin used for reference at the corner of midline and bottom drawn line.
Pin helps align that point to the bottom of the back dart
Pin in place
Carefully stitch along your marked parallel lines, starting and stopping (with backstitching) at the exact same points for both lines.  
Stitched lines, stopping at the same point to create equal length seams.
Fold the welt facing in half and carefully make a small cut between the two lines of stitching.  Open up the piece and extend the cut line in both directions until about 3/4" from the ends of the stitching lines and cut a V toward the "corners".  Slit as close to the stitching as possible without cutting the thread.
Cut a small starting point, then open the slit further.
V notch at the ends of the welt opening.
One at a time, fold the upper and lower flaps of the welt facing over the opening and press to flatten the seam.  (Only the top flap is folded here).
Pressing the seams open helps create the window in the next step.
Push both flaps through the window toward the wrong side of the pants.
Pushed through to the back side
Manipulate the facing so that it lays flat and even around in the opening and press in place.  
Don't be confused, the pants are upside down here!
Now the welt facing creates the welt!  Fold the bottom flap upward, enough to match the top edge of the window.  Flip to the front to make sure the welt is even (1/2" in width), then press in place.
The pants are still upside down, the bottom flap is being folded.
Close-up to show the fold from the side
With pants right side up, fold the side of pants toward the center to reveal the tiny little triangle created by the V notch.  This must be stitched down to secure the sides of the welt and structure the pocket. Stitch through the triangle and folds of the welt facing, as close to the fold line as possible without stitching over it.  Repeat on the other side.
Fold side of pants over to reveal the wrong side of the welt facing
Stitching on the welt facing side
Stitch in the ditch along the lower edge of the welt to keep the welt in place.

Cut the Pocket Front piece out of lining fabric.  Position the top side of the pocket front to the bottom of the welt facing, right sides facing.  Sew with 1/2" seam allowance and press the pocket from downward.
Pocket front aligned with the bottom of the welt facing.
Pocket front pressed downward
Cut the Pocket Back from self fabric.  Position the piece over the welt facing/ pocket front, matching bottom and sides.  If the top hangs over the waistline, trim it off to match the waistline.
Pocket back over the welt facing/ pocket front
Pin the pocket back in position and carefully flip the whole thing over so the pants are right side up. Fold down the pant waist to reveal the welt facing and top of the pocket back. Stitch  through the welt facing and pocket back along the welt facing close to the fold line to stabilize the pocket and attach the welt window to the pocket back.
Pants are folded back to reveal the wrong side of the welt facing and pocket back
Stitch close to the original upper "window" stitching line
Seam or serge around three sides of the pocket, making sure to catch all the pocket layers and not the pants piece.
All pocket layers pinned in place
Serge around three edges
Baste along the upper edge and continue on with the rest of your pattern!
Good luck and let me know if you have any questions!